How to Manage my invoices?
As Zaiffer is a privacy protocol and all transfers are encrypted and confidential you will have to manually reconcile your paid invoices.
Important note to better understand how managing your invoices work:
As Zaiffer is a privacy protocol and all transfers are encrypted and confidential you will have to manually reconcile your paid invoices.
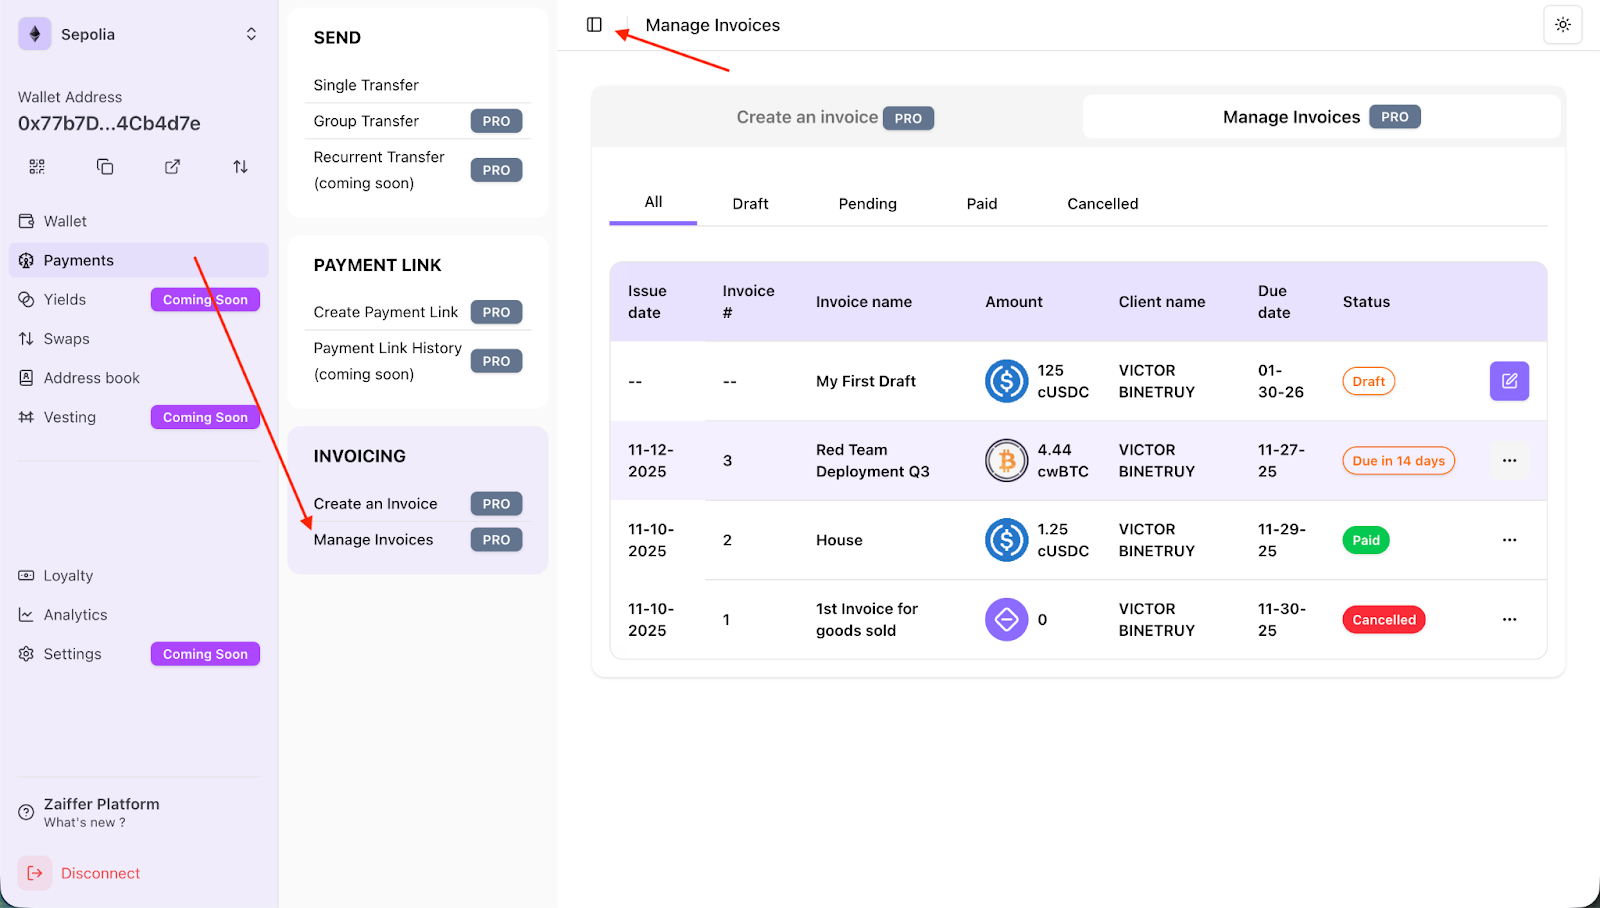
Without further ado, navigate to the “Payments” section of the menu and click on “Manage invoices”.
Click on the icon to the left of the “Manage Invoices” title in the navigation bar at the top to collapse the left sidebar to give us more space to work with.
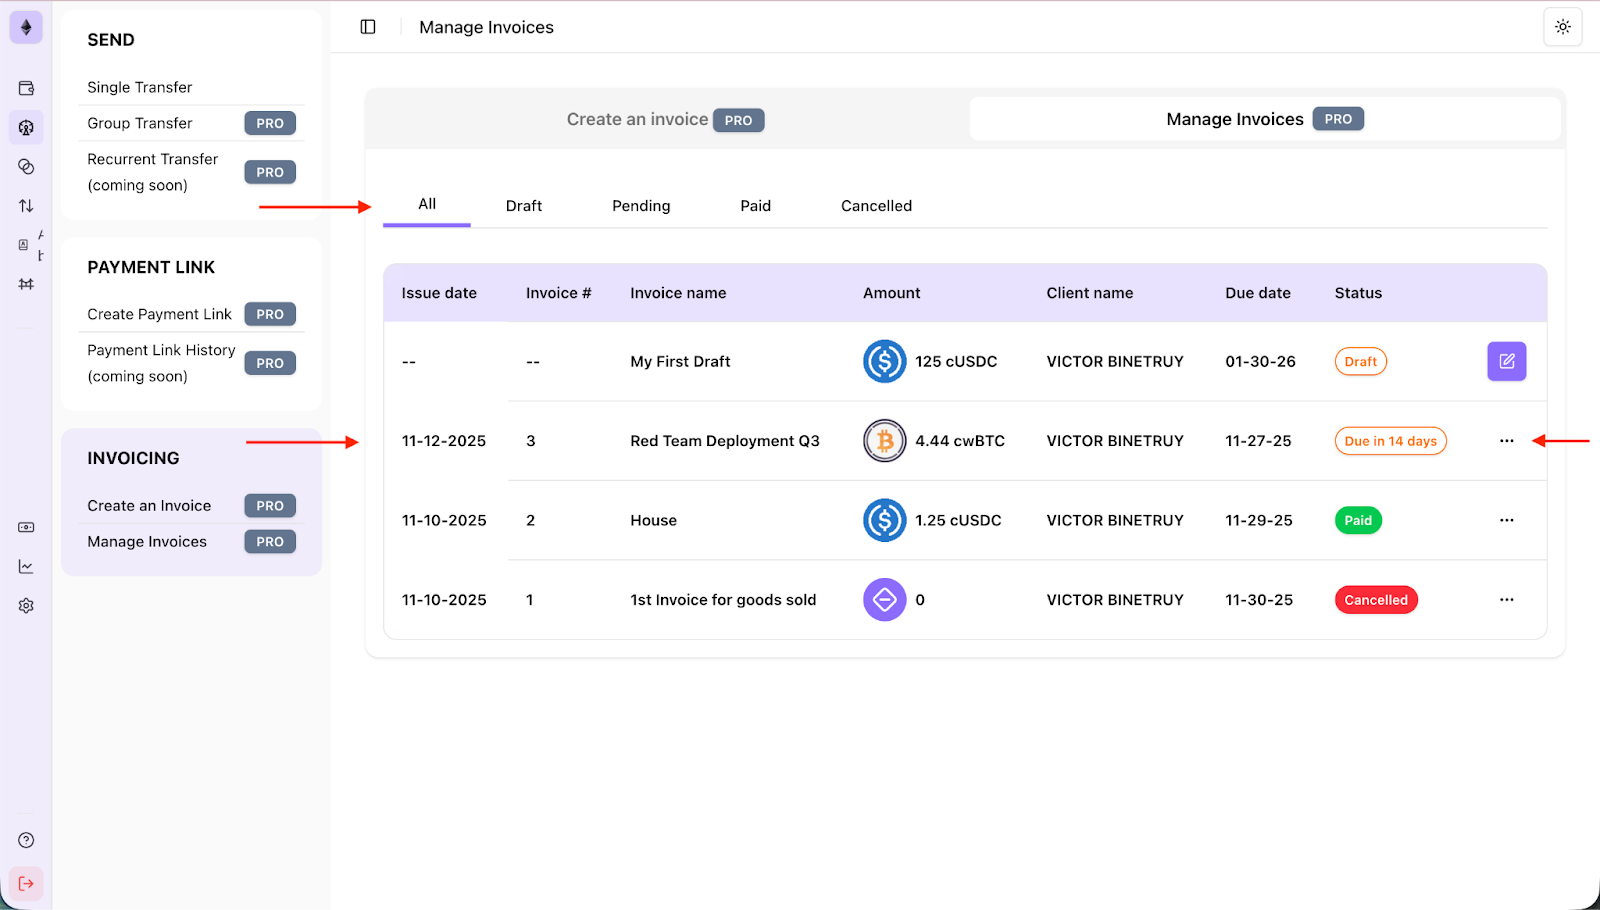
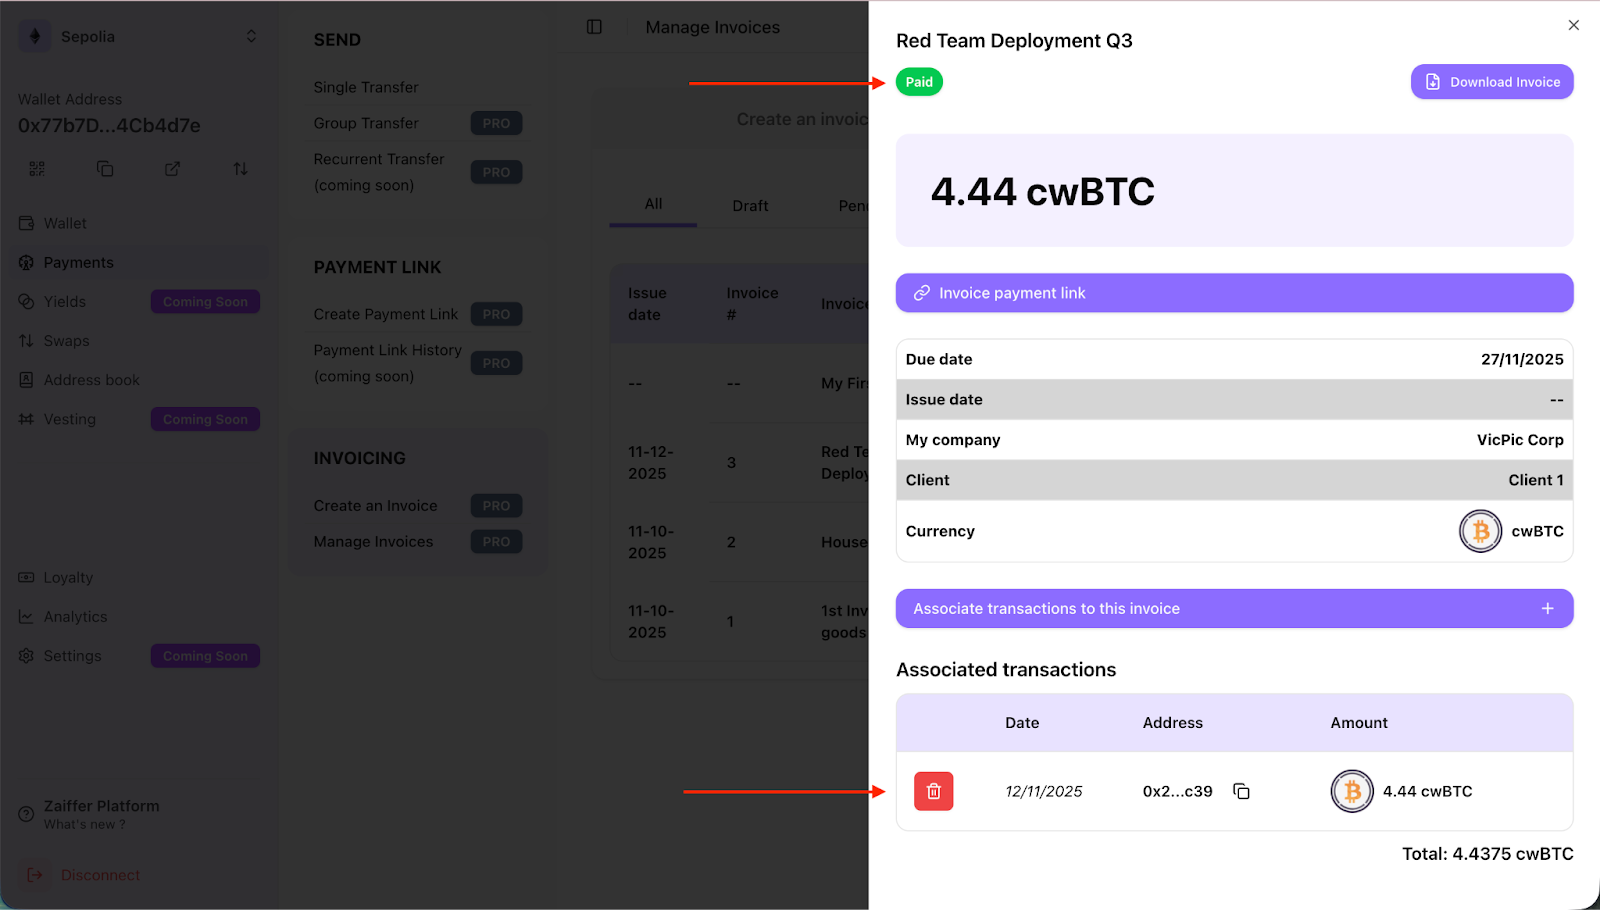
This dashboard regroups “Drafts, Pending, Paid, Cancelled” invoices. You can easily filter them above the table. We will be handling the “Red Team Deployment Q3” invoice in this tutorial, an unpaid invoice due in 14 days.
Click on the three dot icon on the right side (associated with the invoice) to open the invoice details.
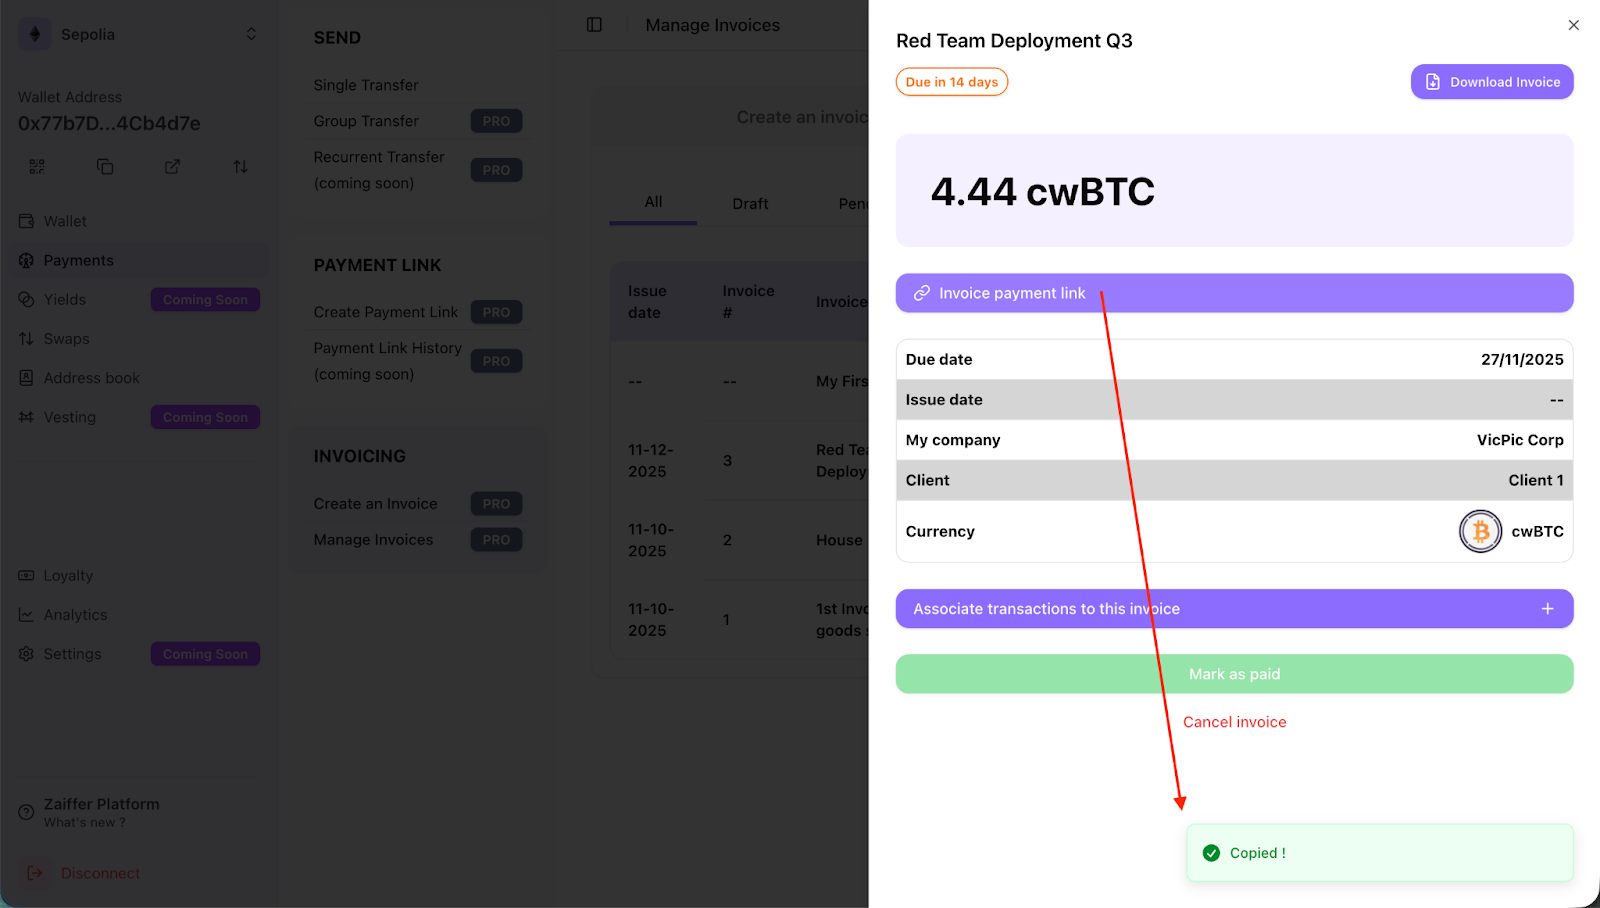
You can now view all the information related to this invoice. The 3 main components that we will be reviewing are:
- Download invoice
- Invoice Payment Link
- Associate transactions to this invoice (and mark it as paid)
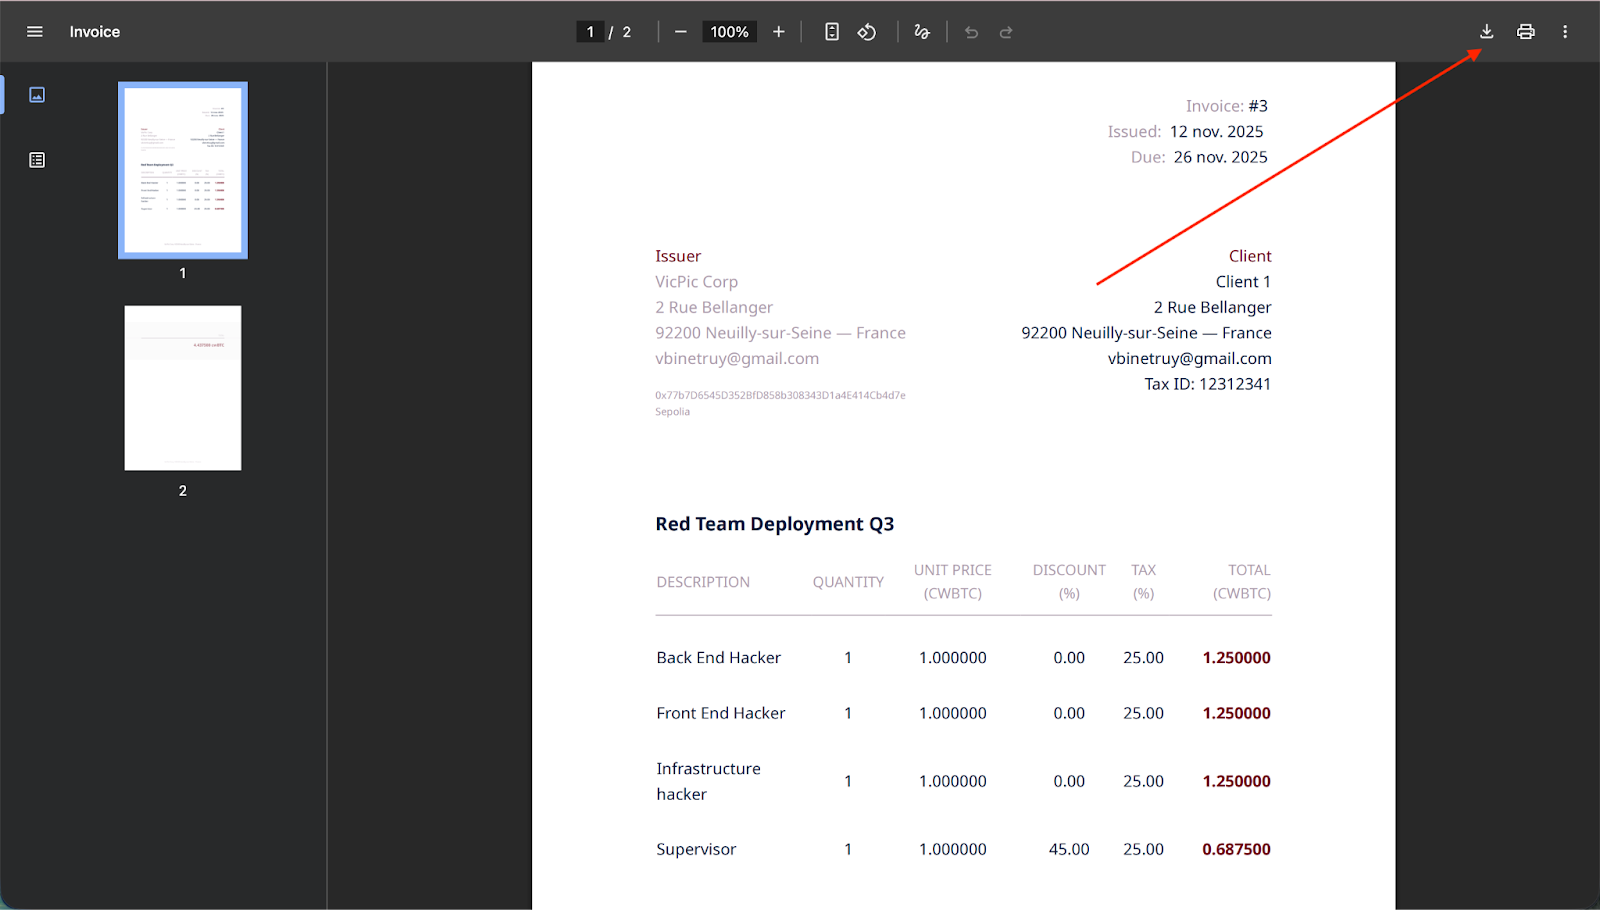
Firstly, click on “Download Invoice” (top right corner)

1. This action will open your invoice in a PDF format in a new tab in your web browser. For security reasons, if you share the URL and someone tries to open it they won’t be able to see the invoice. You have to click on the download icon to download the PDF and then send the file to whomever you want.
2. Back to the invoice details, if you click on “Invoice Payment Link” this will copy the payment link. You can paste it anywhere (email, new tab). This link will open the payment link which allows your client to see the invoice details and pay you directly with confidential tokens. (To know more about how payment links work, please refer to the Payment link tutorials)
3. Back to invoice details, let’s now associate a transaction to your invoice. Click on the “Associate transaction to this invoice” button.
This will open a list of all transfers using that token that you have received on your account. If need be, reveal the amount of your transaction that is hidden.
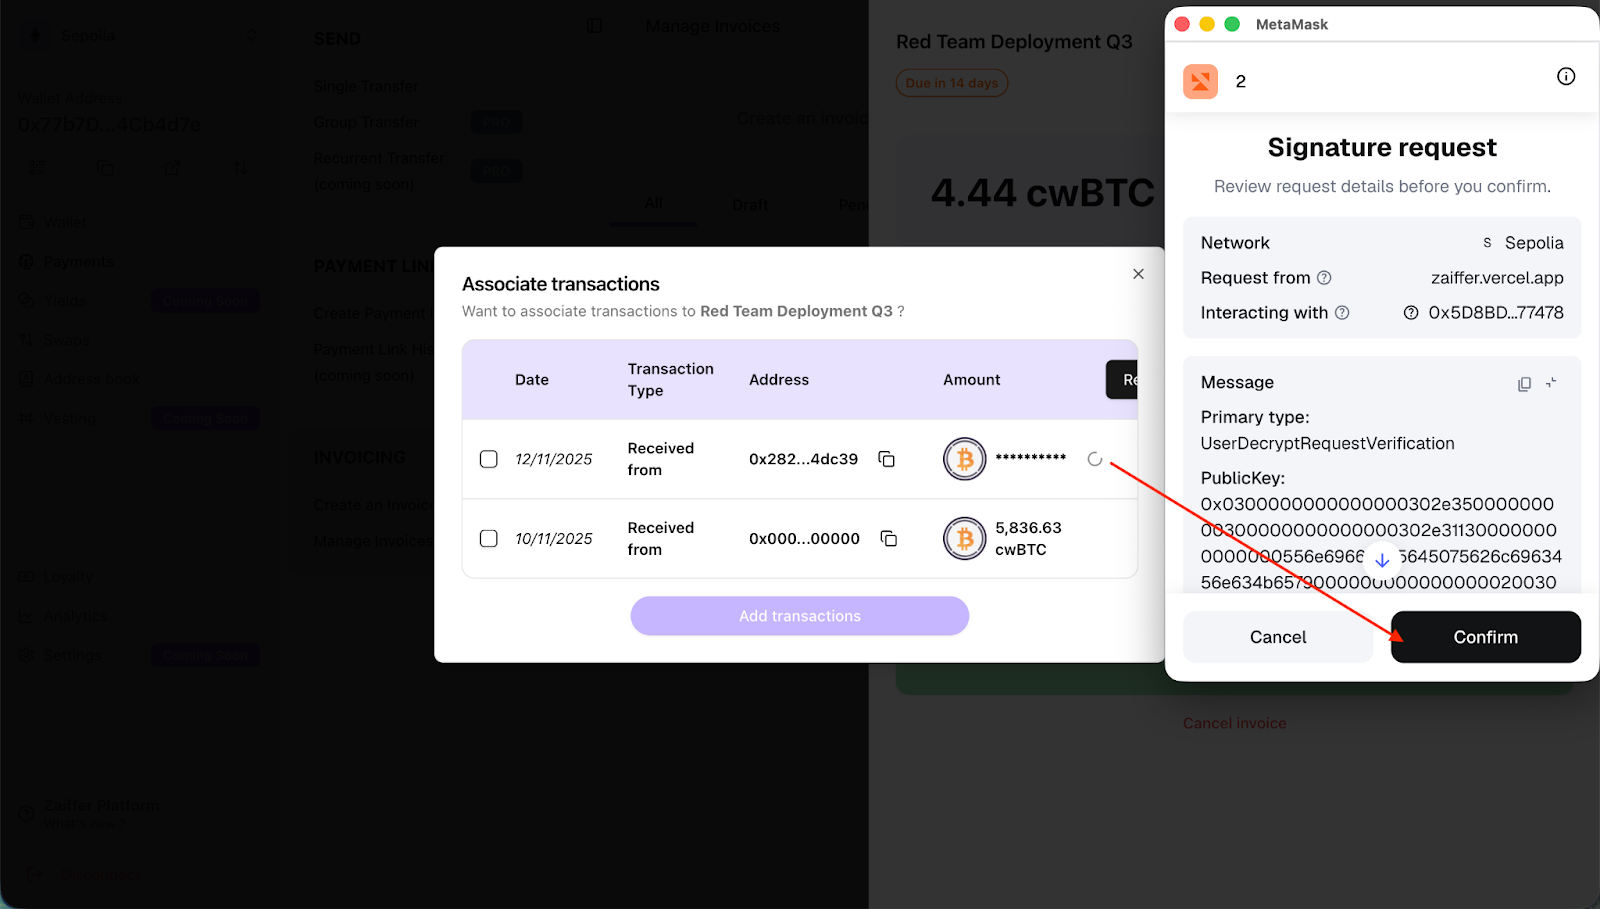
And select the transaction that corresponds to the amount of your invoice. You can select multiple transactions if your client has paid you via multiple transfers (which must be in the cToken (currency) that you have chosen for payment when creating your invoice)
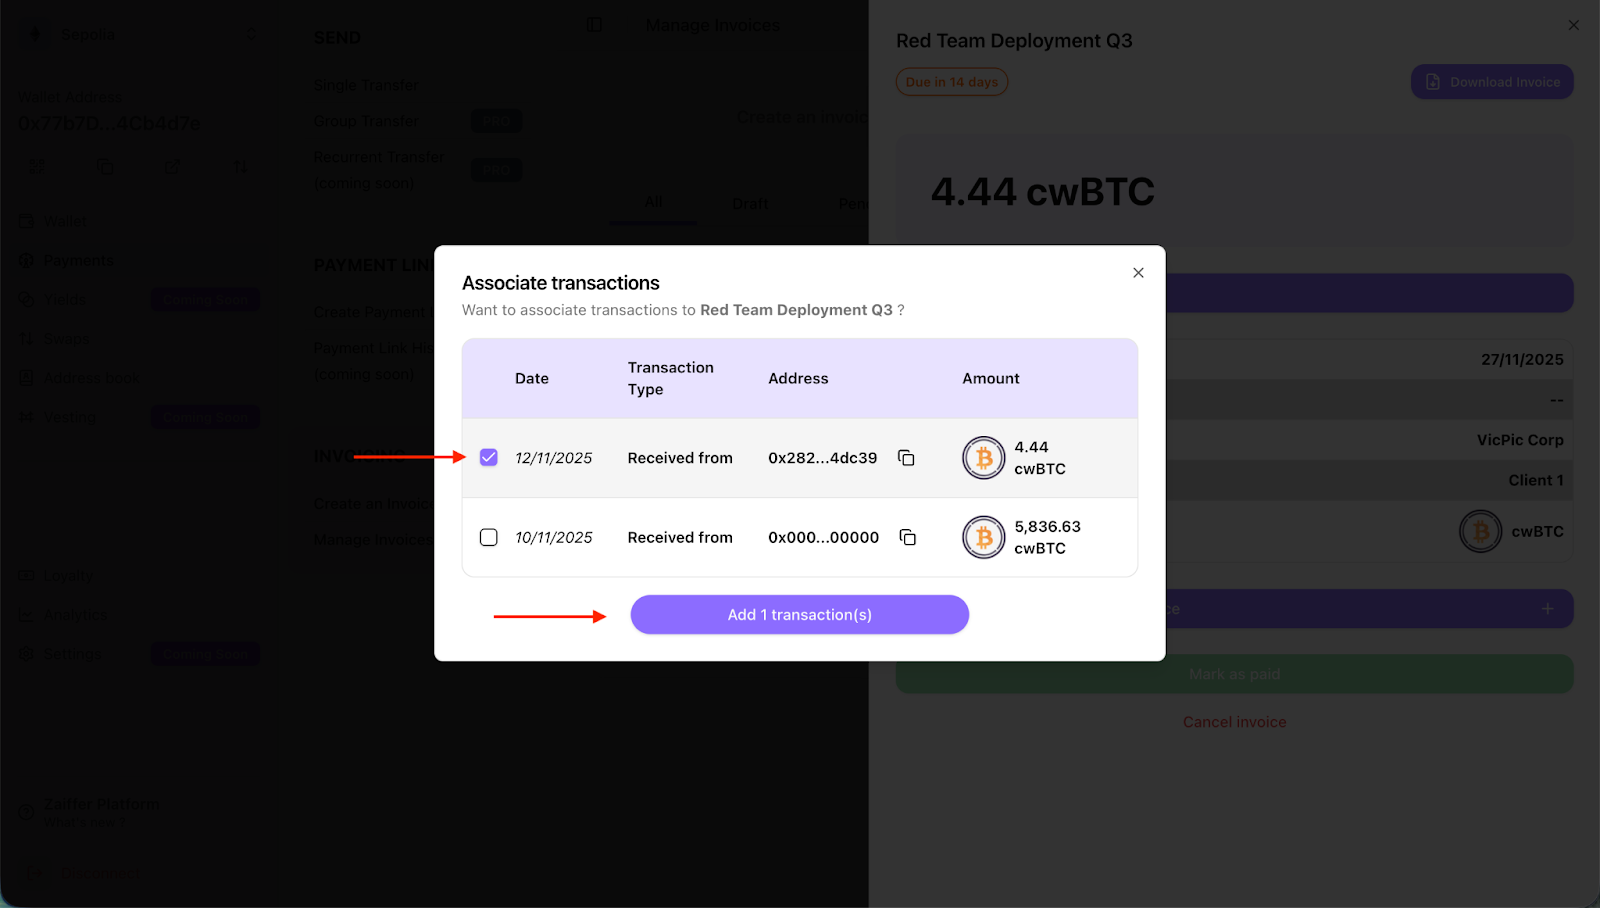
Now that you have added one or more transactions, the “Mark As Paid” green button will be shown and clickable only if the total amount of associated transactions is equal to or greater than the total amount of your invoice.
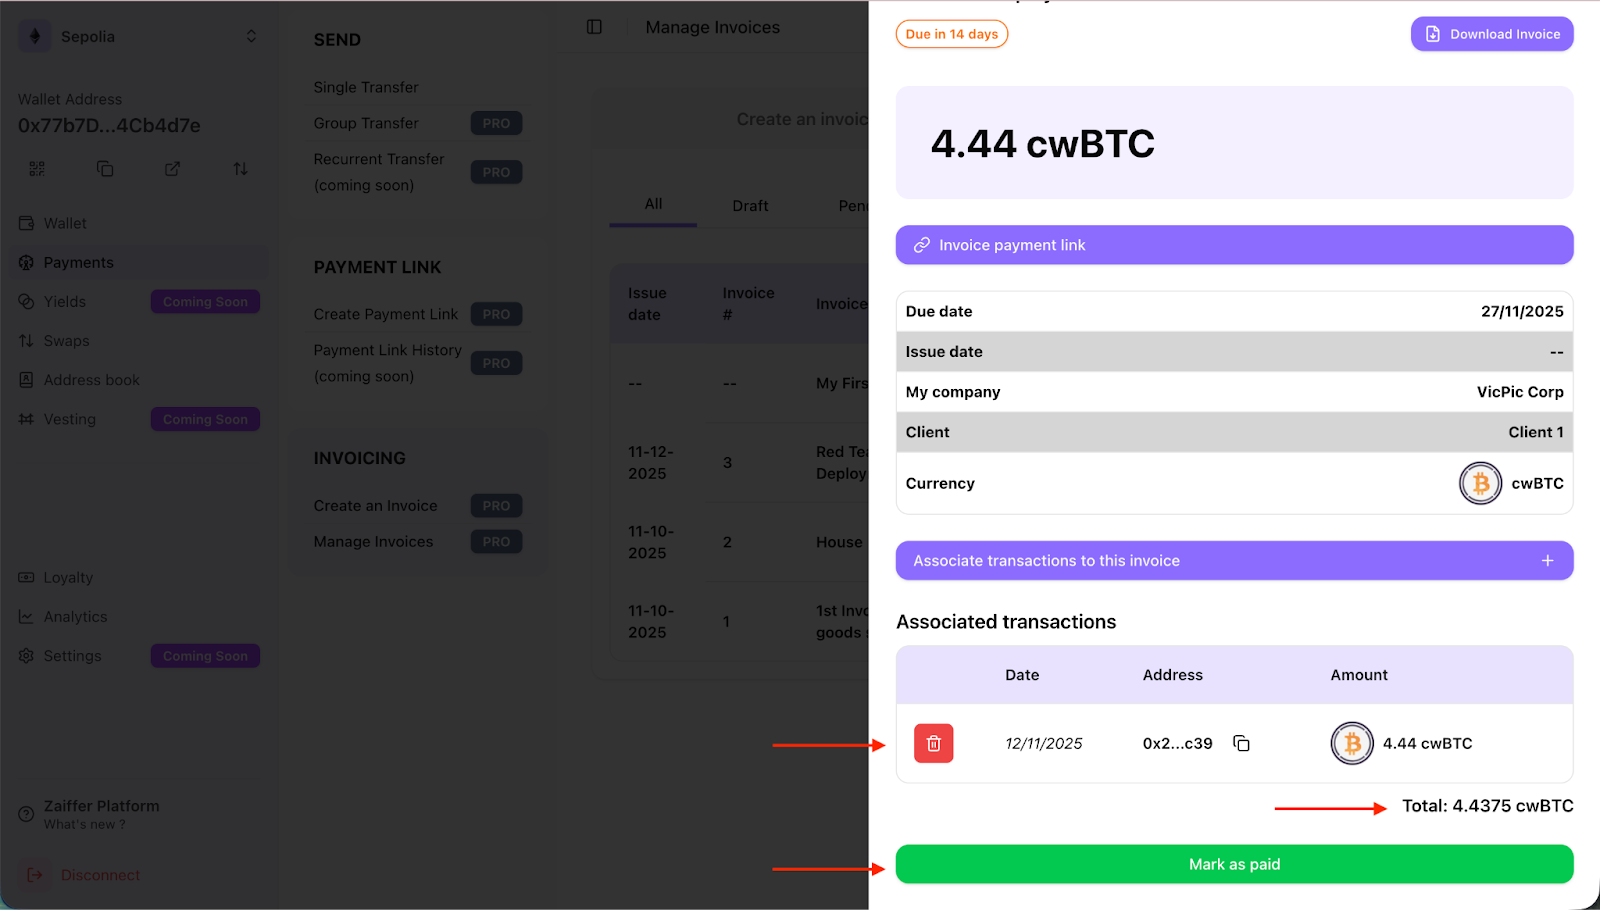
The invoice is now marked as paid. If you have associated the wrong transaction or want to backtrack, you can click the garbage icon associated with the transaction that you want to remove.
This action will remove the transaction and revert the status of your invoice to “Pending” (awaiting payment).
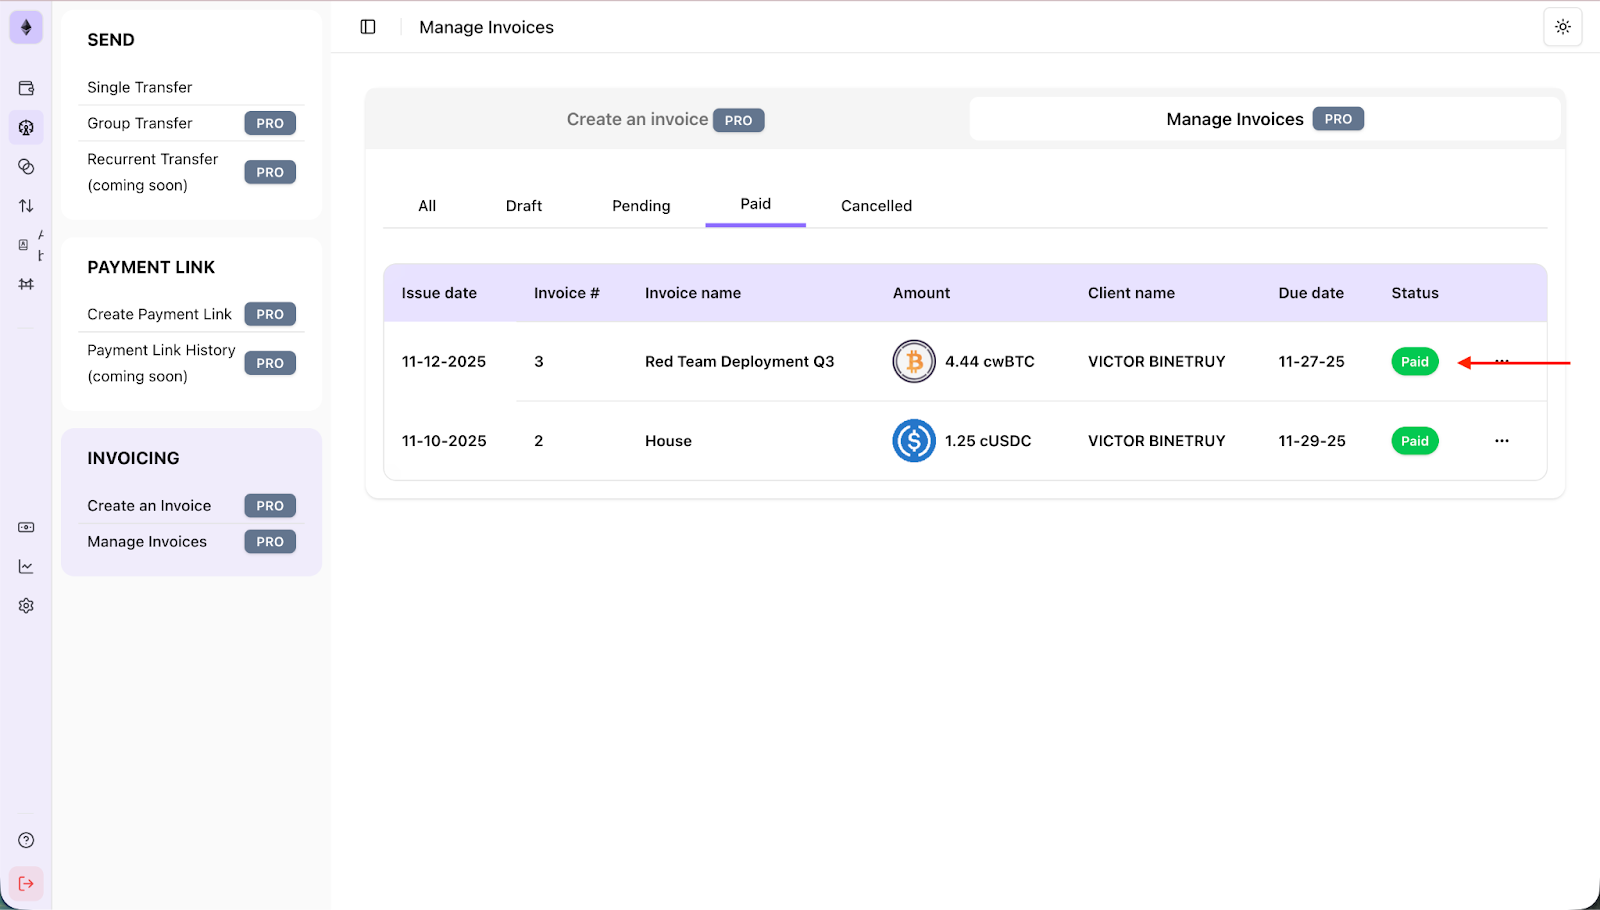
Now that your Invoice is “PAID” you can view it in the Paid section of manage invoices alongside all other paid invoices.